I love the HGTV show "Design on a Dime", even though they spend much more than what I consider to be a dime. But I guess by the time you own a house and want to redo something, $1,000 is cheap. I mean, I'm actually guessing, because I have zero experience with that (and don't even know how many more years it will be before I know what that is like).
So here we are, almost four years into our marriage, still living on a student budget, renting apartments that we aren't allowed to paint or do anything to really (although I long ago decided that it was worth it to me to lose a few dollars from our deposit to put some nails in the walls and make it feel like a home while we live there). I really wanted to do something cute for the girls, but was stuck with the white-ish walls and a pretty small budget. So here's what I came up with
(it ended up costing me about $1 to make each of these, not including the cost of tools like the paper cutter and ink pad):
I'm pretty happy with the way they turned out. I do want to to add some more decoration eventually, but for now I think it makes their spaces look cute and personalized, and it was easy on the wallet too! So you want to know what I did? This is my tutorial for a 32"x16" name board (because that is how big my cardboard was).

I started with a cardboard box. We've moved somewhere around 6 times since we've been married, so we had plenty of these. But even if you don't, I hear a lot of stores give them away once they're done unloading shipments. Or you can keep an eye on the free section of craigslist -- there's always someone giving away boxes. Absolute worst case scenario, you splurge and buy a new one. Anyway, I used one side of the box, plus the top and bottom flaps. I cut another flap in half and used it to reinforce the folds where the flaps meet the side. (In the future, I would probably avoid using a piece with creases, because it gave me a little trouble at the mod podge stage. But if you want something bigger than just the side of a box, it's manageable.)

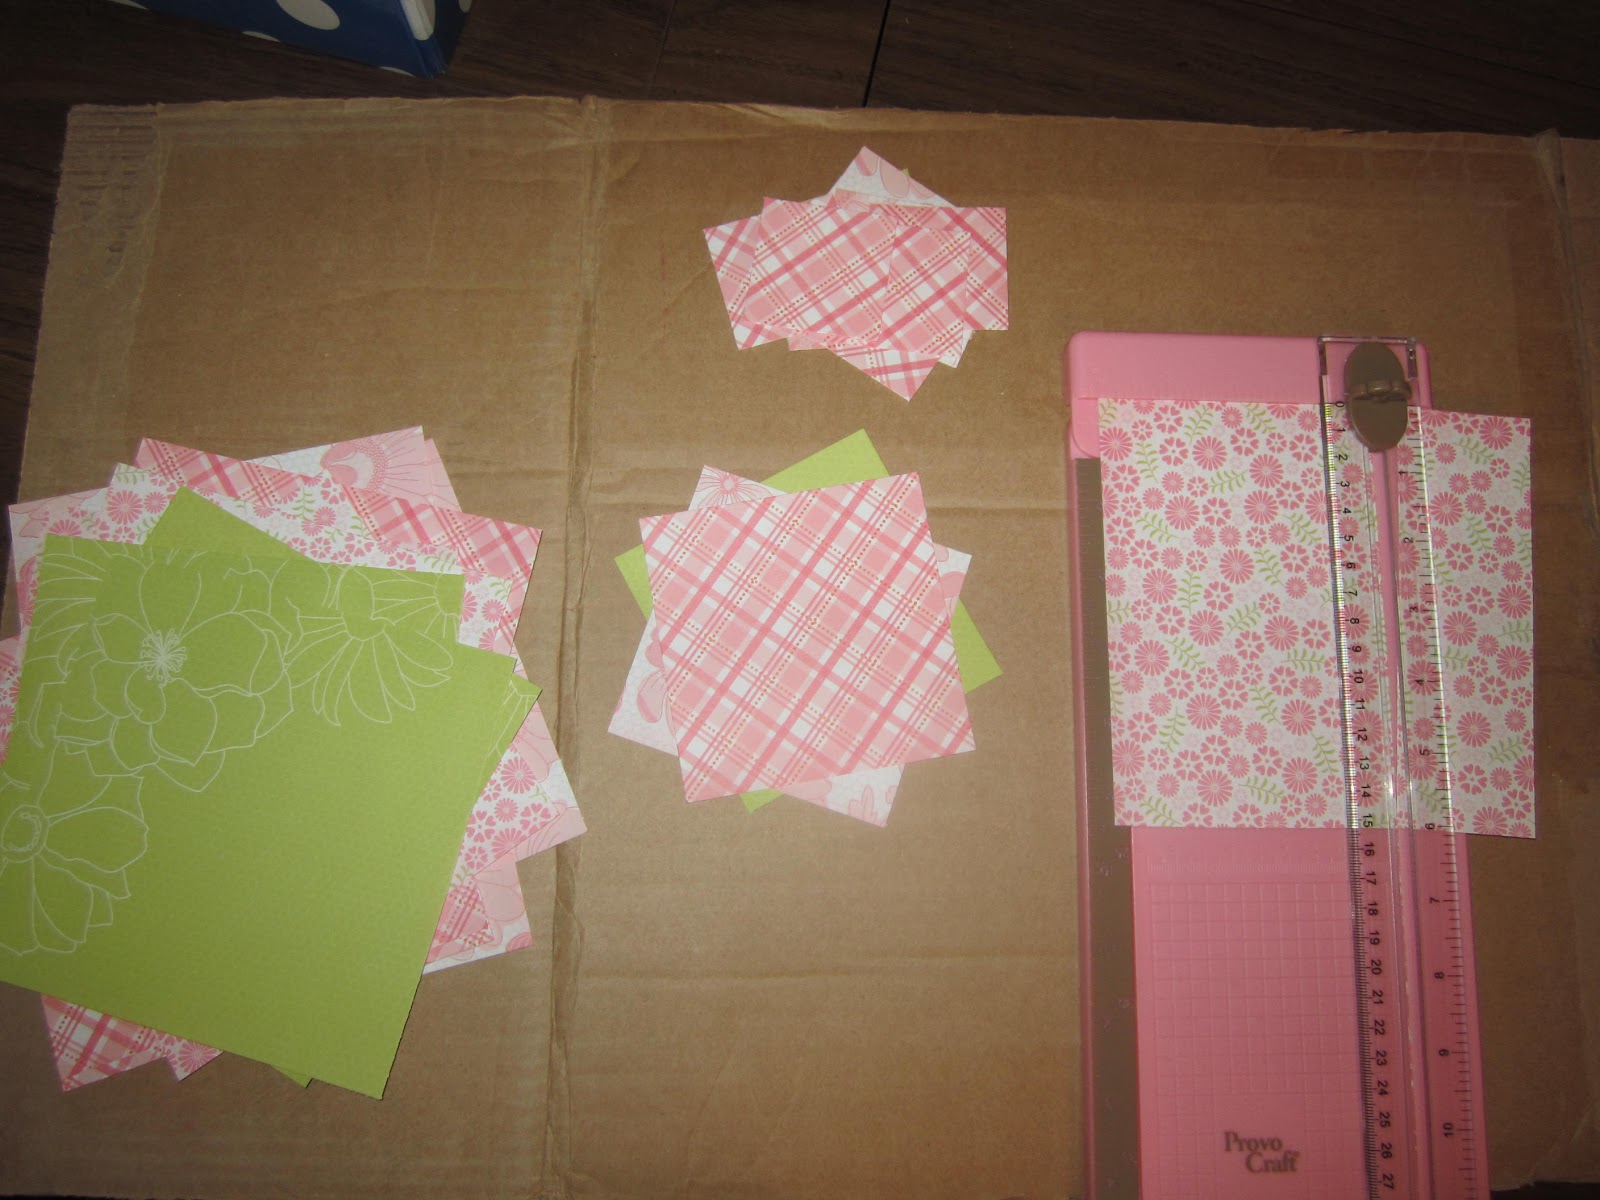
Next, I picked four sheets of scrapbooking paper that I wanted to use. I love buying big stacks of paper, because you know all the stuff inside is going to coordinate well. It makes selections much easier. Stacks of 180 sheets usually go for $20, so if you go when there is a sale or you have a coupon, you can get one for $10 or so. So four sheets cost me about 25 cents.
I cut each sheet into four 6"x6" squares, then cut one square of each pattern into one 4"x4" square and five 2"x2" squares. Then comes the fun part: positioning the pieces! As you go through, you may need to cut some more of the 6" squares into the smaller 4" and 2" ones, so keep your paper cutter handy.
I basically just started on one end and worked across, leaving the small squares for last, since those are the easiest to fit. I made it so that each pattern was never adjacent to itself, and tried to avoid having them even touch corners when possible (there were a couple places where they did end up touching corners). When I got done, I didn't think the green was spread out well enough, so I just made a few adjustments.
Again, I moved the bigger pieces first, and then made the smaller pieces fit. At this point, you need to TAKE A PICTURE. You will need to refer to it, since you have to take all the pieces off. Set aside all the pieces that you did not use. You may need them, but it will be easier if they aren't mixed in just yet.
Using an inkpad, carefully distress the edges of all the squares that you will be using. Because I'm a little bit OCD, I rotated through all the patterns to see how many of each I used. I found that I had the same number of 6" and 4" squares for each pattern, but had fewer 2" squares for one of the patterns.
If I switched one of each of the first two patterns for the third pattern, I would end up with equal amounts for each. I really hoped I could do this, and set these pieces aside in pairs, just in case I could make it work.
Once all my squares were inked, I referred to my picture and stuck them all back on. With the first one, I just stuck some double sided tape in the center of each square, thinking the mod podge would get all the corners nicely. This was not my best idea. For the second one, I actually stuck tape in the middle and on each of the four corners. It took much longer, but the mod podge worked a lot better. (In the future, I think I might actually skip the tape, and just use the mod podge as the base adhesive when applying the squares to the cardboard. I think this would have helped out with some of the wrinkling I got.)

Anyway, after sticking the papers down, I cut out letters for the names. I divided the width of the board (32") by the number of letters, to figure out how wide to make the letters. So for five letters, I cut some paper so it was 6" wide. For Bekka's name, this meant only two more sheets of paper (so another 12 cents). For six letters, I cut the paper into 5" strips (but still made the small letters 6" tall). Anyway, I just free-handed the letters on the back side of the paper (drawing them backwards so they looked right when I cut them out). I inked the edges on all the letters too. On the first one (where I only taped the middle of the squares), I stuck the letters down with double sided tape
before applying the mod podge. This was not a good idea. So on the second one, I put the mod podge over the paper squares, then applied the letters and put mod podge over them. This method worked much better.
Since I wanted to make this project as budget-friendly as possible, I decided to make my own mod podge. It was actually super easy, and the only downside was that homemade mod podge only comes in matte finish, so if you want the glossy stuff, you've got to splurge. Anyway, you add equal parts white glue and water (I just used the whole bottle of glue, then filled it with water and added that) in a glass jar. Put the lid back on and shake it until it's completely blended. Then it's ready to brush on like the expensive stuff!


So, like I said, the first one did not work out as well as I had hoped. Since I didn't tape the corners down, they all started curling up. And since I adhered the letters before any mod podge touched the project, they started getting too wrinkly. The second one worked much better, and I only had a couple corners come up. There was more wrinkling than I had hoped for, but like I said, I think in the future that would be helped if I actually used the mod podge to stick the paper to the cardboard.
After letting them dry, I went back and touched up all the curled corners with some more mod podge, and they did end up looking pretty nice, despite the wrinkling. I got out a hammer and some nails and stuck those babies right about my girls' beds.
So now that I've made two, these are the changes I would make:
1) Avoid using cardboard that has creases or bends (when you apply the mod podge, they show up a lot more)
2) Trim the paper around the edges so that they do not extend past the cardboard base
3) Use mod podge to adhere the squares to the cardboard
4) Apply mod podge over the squares and let dry
before sticking the letters on.
5) Use the mod podge to apply the letters
And for anyone who wants to make a 32"x16" board (or a 16"x8" board with 1", 2", and 3" squares), and doesn't want to figure out the positioning, here are the positions I ended up using:


